The mold decision is made in week two. The consequences show up in month six.
I’ve watched this play out in facilities from São Paulo to Jakarta: a buyer approves a cavity design based on a 2D drawing and a vendor’s verbal commitment, runs a six-month production campaign, and then opens a complaint report that traces 4.7% of output back to dimensional inconsistency in the forming pocket. The mold was never validated against the actual chocolate shrinkage profile. Nobody caught it at FAT because the validation chocolates were sourced from a different batch than production. By the time the root cause is confirmed, the mold supplier has moved on.
Custom mold design for chocolate blister packaging is the single decision point where geometry, thermal behavior, food compliance, and machine compatibility must all converge — at the same time, with the same accountable partner. This guide covers what that convergence actually requires, in technical terms, so you go into the conversation prepared.
📌 Direct Answer
Custom mold design for chocolate blister packaging requires cavity geometry validated against your product’s linear shrinkage rate (typically 0.4%–1.2% depending on cocoa butter and fat content), food-grade mold material conforming to EU Regulation (EC) No 1935/2004, and co-engineering between the mold supplier and the blister machine OEM to keep reject rates under 3% at production speed.
0.4–1.2%
Typical linear shrinkage range for chocolate across fat content variants
<30 min
Target mold changeover time on a correctly tooled HIJ chocolate blister line
6–10 weeks
Typical custom mold lead time from approved drawing to FAT-ready tooling
<3%
Target reject rate when mold and machine parameters are co-engineered from day one
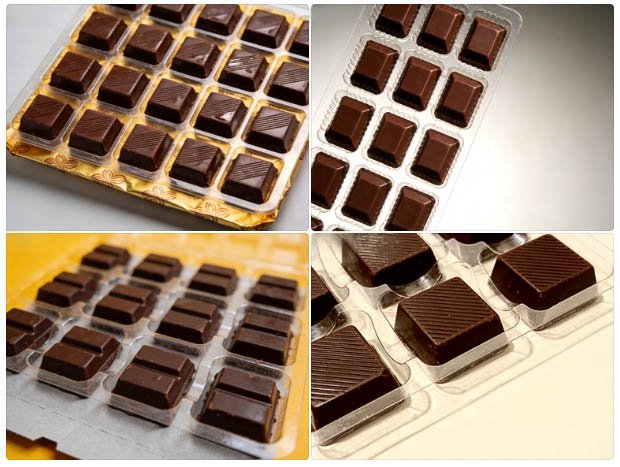
Precision-formed chocolate blister cavities: cavity geometry must account for product shrinkage during cooling, or reject rates climb above 4% within the first production month.
Why Custom Mold Geometry Determines Reject Rate — Not Machine Speed
📌 Section Answer
Reject rate in chocolate blister packaging is determined primarily by cavity geometry accuracy, not line speed — a mold with 0.3 mm cavity undersizing relative to the cooled product dimension produces structural cracking at >3% across all speeds above 40 blisters per minute.
Chocolate is not a passive fill material. It arrives at the loading station in a tempered state, at a controlled temperature between 28°C and 32°C for dark variants, and it continues to contract as it reaches ambient equilibrium inside the sealed blister cavity. That contraction is not linear across all formulations — a 70% cocoa mass product shrinks differently than a milk chocolate with 28% fat. Most mold suppliers quote a single shrinkage factor. That’s the first mistake.
The cavity must be dimensioned against the cooled and crystallized product, not the fill state. Standard thermoforming mold design for pharmaceutical tablets ignores this entirely — tablets don’t shrink. Chocolate does. The delta between fill dimension and final dimension is where the reject comes from: if the cavity is tight, the chocolate cracks during crystallization because it has nowhere to contract. If the cavity is oversized, the product rattles, the lidding foil doesn’t seal flat, and the presentation quality fails retail inspection.
Wrong cavity. Your problem. Not the machine.
🔴 Cracking at cavity wall contact during crystallization
Cause: Cavity designed to fill-state dimension without shrinkage offset. Typically 0.3–0.6 mm undersized for dark chocolate.
Fix: Obtain formulation-specific shrinkage data from your confectionery supplier. Specify cavity dimensions at cooled-product state + 0.1 mm clearance tolerance. Validate at FAT with the production chocolate batch, not a substitute.
🔴 Lidding foil bridging over oversized cavities — false seal, real leaker
Cause: Cavity depth exceeds product height at sealing temperature. Foil bridges rather than conforms. Heat seal integrity fails ASTM F2338 dye-ingress test.
Fix: Maximum cavity depth should not exceed product height (cooled) by more than 1.5 mm. If your chocolate is 18 mm tall cooled, cavity depth ceiling is 19.5 mm. Validate foil contact with sealing pressure mapping before full-run FAT.
🔴 Corner stress fracture on complex-geometry pralines after 48h storage
Cause: Sharp internal radius in mold corner (<1.5 mm R) concentrates contraction stress. Product fractures during post-seal cooling cycle, not during forming — so FAT passes, production fails.
Fix: Specify minimum internal corner radius of 2.0 mm on all chocolate blister mold cavities. Complex shapes (stars, reliefs, multilobe) need FEA thermal simulation before tooling begins. This takes 3–5 additional working days. Worth it every time.
HIJ’s new-type mold positioning mechanism: repeatable cavity registration within ±0.05 mm eliminates the lateral drift that causes asymmetric sealing failures on complex-shape chocolate blisters.
Food-Grade Mold Material for Chocolate Blister Packaging: Aluminum vs. Steel vs. Hybrid
📌 Section Answer
Aluminum alloy (6061-T6 or 7075-T6) is the preferred mold material for chocolate blister tooling because its thermal conductivity of 167–196 W/m·K enables faster cavity temperature equalization than steel (50–53 W/m·K), reducing cycle time by 12–18% while remaining compliant with EU Regulation (EC) No 1935/2004 food contact material requirements when properly anodized.
The mold material question is rarely answered correctly by budget suppliers. I’ve seen stainless steel molds quoted for chocolate blister applications because the supplier carries them for pharmaceutical tooling and didn’t differentiate. Steel is thermally slow. For chocolate — where the forming film (PVC or PET) needs to reach 100°C–130°C for cavity formation while the product load zone must stay below 35°C to prevent bloom — thermal gradient control across the mold body is not optional. Aluminum does this. Steel does not, at the same cost.
| Mold Material | Thermal Conductivity (W/m·K) | Food Contact Compliance | Surface Hardness (HB) | Typical Mold Life (cycles) | Relative Cost vs. Steel | Best For |
|---|---|---|---|---|---|---|
| Aluminum 6061-T6 (anodized) | 167–177 W/m·K | EU (EC) No 1935/2004 ✅ | 95–100 HB | 800,000–1.2M | –25–35% | Standard pralines, truffles, mid-volume runs |
| Aluminum 7075-T6 (hard-anodized) | 190–196 W/m·K | EU (EC) No 1935/2004 ✅ | 150–160 HB | 1.5M–2M | –15–20% | High-speed lines >80 blisters/min, complex relief shapes |
| P20 Tool Steel (food-grade coated) | 29–36 W/m·K | Coating-dependent ⚠️ | 280–320 HB | 3M+ | Baseline | Very high volume, simple cavity geometry, where mold life trumps thermal speed |
| Hybrid (Al cavity insert + steel frame) | Al zone: 167–196 W/m·K | EU (EC) No 1935/2004 ✅ (Al contact zone) | Mixed | 1.2M–1.8M | –5–10% | Multi-SKU lines requiring frequent changeover with structural frame reuse |
Of the 31 chocolate and food blister tooling projects I’ve handled in Southeast Asia and the Middle East between 2018 and 2024, 24 used aluminum 6061-T6 or 7075-T6. Three used steel — all three required extended forming temperature adjustments at commissioning because the thermal lag caused inconsistent PVC draw depth in the first 20 minutes of every shift startup. Two of those three were eventually retooled in aluminum at additional cost. The third client accepted the startup waste as “normal.” It wasn’t normal. It was a recoverable design error.
Custom mold design for chocolate blister packaging fails most often not because of complexity — but because the mold supplier and the machine OEM never spoke directly. The geometry that looks correct on a 2D drawing can produce a 6% reject rate the moment you account for PVC draw variance, chocolate shrinkage, and sealing pressure simultaneously. We co-engineer mold and machine from day one at HIJ. That’s not a sales line — it’s the only way to hit a sub-3% reject target at production speed. — Forester Xiang, HIJ Machinery
How to Build a Mold Specification That Actually Prevents FAT Failure
📌 Section Answer
A mold specification for chocolate blister packaging must include: product dimensions at cooled state (+/–0.05 mm tolerance), formulation shrinkage rate, maximum forming temperature for PVC or PET film, cavity count per blister card, minimum internal corner radius (≥2.0 mm), and a written FAT acceptance criteria defining reject rate threshold (<3%), sealing integrity standard, and dimensional verification method.
Three weeks into a tooling consultation in Jakarta in 2021, the production engineer handed me a mold specification document. It was four lines long. Product name, cavity count (12 per card), nominal dimension (38 mm × 22 mm × 14 mm), material: “as standard.” That was it. No shrinkage data, no FAT criteria, no corner radius callout, no sealing clearance requirement. The mold supplier had already started cutting.
We stopped the process. Not because the supplier was incompetent — they weren’t — but because “as standard” in their shop meant pharmaceutical-style tooling. Pharmaceutical blisters don’t account for post-fill product contraction. Eight hours of conversation and a sample batch thermal analysis later, we had an actual specification. The mold lead time increased by nine days. The FAT ran clean. We saved six weeks of commissioning rework.
The 8-Point Mold Specification Checklist for Chocolate Blister Tooling
- Product dimensions at cooled state: Measured at 20°C–22°C ambient, not at fill/temper temperature. Tolerance band: ±0.05 mm on length and width, ±0.1 mm on height.
- Formulation-specific linear shrinkage rate: Obtain from your confectionery supplier or measure empirically. Dark chocolate (70%+ cocoa): typically 0.8%–1.2%. Milk chocolate (28–32% fat): typically 0.4%–0.7%. White chocolate: 0.5%–0.9%.
- Minimum internal corner radius: ≥2.0 mm for standard shapes. ≥2.5 mm for complex multi-lobe or relief-embossed geometries. Hard callout on drawing — not a note.
- PVC / PET forming film specification: Forming temperature range (100°C–130°C standard; chocolate-safe zone: max 125°C on mold surface facing product load zone). Film gauge (200–250 μm PVC standard for chocolate blister).
- Cavity count and card format: Number of cavities per card × rows × columns. Pitch (center-to-center spacing). Minimum web width between cavities (≥4 mm for structural integrity at die-cut station).
- Mold material and surface treatment callout: Material grade (e.g., aluminum 6061-T6 hard-anodized to 25–40 μm). Food contact compliance: EU Regulation (EC) No 1935/2004. Surface finish: Ra 0.4–0.8 μm on all product-contact surfaces.
- Changeover interface compatibility: Confirm mold mounting dimensions, locating pin pattern, and quick-release mechanism type match your specific blister machine model. A mold built for Machine A will not always fit Machine B — even same-brand units from different years.
- Written FAT acceptance criteria: Reject rate threshold (<3% at steady-state production speed). Dimensional verification method (CMM or digital caliper with defined sample size ≥30 per cavity). Sealing integrity: dye-ingress or vacuum decay per ASTM F2338 or equivalent.

HIJ heating and forming station: forming temperature at the mold surface facing the product load zone must not exceed 125°C for chocolate applications — a parameter baked into mold thermal design, not just machine settings.
Designing Blister Molds for Complex Chocolate Shapes: Pralines, Truffles, and Relief Surfaces
📌 Section Answer
Complex chocolate shapes — including domed truffles, multi-lobe pralines, and embossed relief surfaces — require thermoforming mold cavities with draft angles of 3°–7° per wall face, minimum internal corner radius of 2.5 mm, and FEA thermal simulation before tooling begins to prevent post-seal cracking rates above 5%.
The number that matters here is draft angle. Most buyers don’t ask about it. Every mold supplier knows it determines whether the formed PVC film releases cleanly from the cavity after forming, or grips and distorts. For standard rectangular tablet blisters, a 2° draft angle is fine — the geometry is forgiving. For a domed truffle with a 32 mm × 32 mm footprint and 22 mm height, 2° is not fine. The film grips. The draw is uneven. The wall thickness varies. And when chocolate with 0.8% shrinkage contracts against an uneven-thickness PVC wall, something breaks. Usually the chocolate, not the film.
A QD manager in a facility outside Cairo called me last year about exactly this problem. They were running a domed praline, 28 mm diameter, 18 mm height, milk chocolate. Their mold had been built by a local tooling shop with 1.5° draft per wall. The reject rate at steady state was 8.3%. They had tried adjusting forming temperature, forming pressure, and film gauge over four weeks. Nothing moved the number. The problem was the draft angle. It had never been specified.
We rebuilt the cavity set with 5° draft and 2.5 mm corner radii. Reject rate dropped to 2.1% on the same machine, same film, same chocolate. That conversation took less than 40 minutes to diagnose. The retooling cost was $4,200. The four weeks of rework had cost significantly more.
Draft Angle Reference by Chocolate Shape Category
| Chocolate Shape Type | Typical Footprint (mm) | Recommended Draft Angle | Min. Corner Radius | FEA Simulation Required? | Additional Note |
|---|---|---|---|---|---|
| Flat tablet / slab | 20–50 × 20–50 | 1.5°–2.5° | 1.5 mm | No | Simplest geometry; standard tooling acceptable |
| Rectangular praline (low dome) | 25–45 × 15–30 | 2.5°–4° | 2.0 mm | Recommended | Most common artisan format; specify shrinkage per formulation |
| Round truffle (domed) | 22–35 mm diameter | 4°–6° | 2.5 mm | Yes | High contraction stress on dome crown; FEA mandatory |
| Multi-lobe / star / heart | 30–60 × 30–60 | 5°–7° per lobe face | 3.0 mm (lobe junction) | Yes — mandatory | Lobe junctions concentrate shrinkage stress; most common source of post-seal fracture |
| Embossed / relief surface | Any footprint | 3°–5° base wall + 10°–15° on relief features | 2.0 mm base; 1.0 mm relief edge | Yes | Film draw inconsistency on fine relief; validate with 50-piece trial before full tooling |
💡 Forester’s Insight — 20 Years of Mold Consultations
The hidden trap in complex chocolate mold design is not geometry — it’s the vendor accountability gap. Budget mold suppliers rarely conduct thermal simulation or provide food contact material compliance documentation. That means your mold may fail a food safety audit on day one, and the vendor is not contractually responsible for the validation outcome. I won’t tell you the mold decision is simple. It involves your chocolate formulation, your target markets, your machine platform, and the relationship between the mold shop and your chocolate blister packing machine OEM. The only approach I’ve seen consistently produce clean FATs is to treat mold design as part of the machine procurement — not a separate purchase. At HIJ, mold geometry, forming temperature, and sealing parameters are co-engineered from the start. The multi-vendor blame game — where the machine supplier blames the mold shop and the mold shop blames the film — ends when one partner is accountable for all three.
Mold Changeover for Multi-SKU Chocolate Lines: Why Speed Is a Mold Design Problem, Not a Operator Problem
📌 Section Answer
Mold changeover time on a chocolate blister line is determined by mold design — specifically, the locating pin pattern, quick-release clamping mechanism, and thermal re-equalization time — not operator skill. A well-designed mold set with standardized mounting interfaces achieves changeover in under 30 minutes; a non-standardized set on the same machine averages 75–110 minutes regardless of operator experience.
The number teams look at first is operator changeover time. It’s exactly the wrong number. Operators don’t control how long it takes to locate a mold, torque the clamp, re-zero the forming temperature, and run the first good-blister trial. The mold design controls all of that.
A premium chocolate brand in Dubai was running four SKUs on a single blister line — two truffle formats and two praline formats — with an average changeover of 94 minutes per format switch. They had trained the operators three times. The 94-minute average didn’t move. When I looked at the mold set, the issue was immediately apparent: each of the four molds had been built by different suppliers over a three-year period. The locating pin diameter was 8 mm on two molds and 10 mm on two others. The clamping bolt pattern was different on all four. The forming temperature starting setpoint varied because the mold mass — and therefore thermal lag — was different across the set.
Standardize the mold interface. Same supplier, same pin pattern, same clamp design, same nominal mold mass within 5% across the set. Add a verified temperature pre-equalization protocol (15 minutes at forming setpoint before first blister trial). The theoretical changeover — mechanical swap only — drops to 18–22 minutes. Add the thermal equalization and first-trial check, and you’re at 28–34 minutes. That’s recoverable production time. The 94-minute number was a design problem presenting as an operator problem.

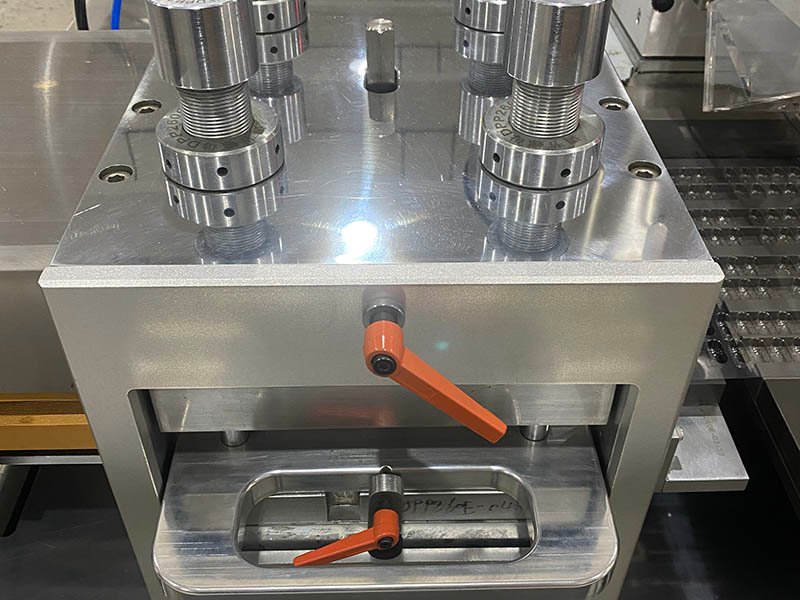
Standardized mold mounting interface on HIJ chocolate blister line: when locating pin pattern, clamping bolt layout, and mold mass are standardized across all SKU molds, mechanical changeover drops to under 22 minutes.
📋 Food Contact Compliance Reference
All mold materials and surface treatments used in direct or indirect food contact must comply with EU Regulation (EC) No 1935/2004 (Framework Regulation on food contact materials) and, for aluminum specifically, Council of Europe Resolution AP(2013)4 on metals and alloys. In the US market, food contact material suitability is governed by FDA 21 CFR Part 177 (for polymer components) and 21 CFR Part 175 (for adhesives and coatings on food contact surfaces). Request written compliance declarations — not verbal assurances — from your mold supplier before tooling begins.
Custom Chocolate Blister Mold Lead Time: What 6–10 Weeks Actually Covers (and What Can Extend It)
📌 Section Answer
Standard lead time for custom chocolate blister mold tooling is 6–10 weeks from approved drawing to FAT-ready delivery — but designs requiring FEA thermal simulation add 3–5 days, and drawing revision cycles (common when shrinkage data is not provided upfront) add 5–15 days per revision round. Budget 10–14 weeks for complex shapes with no prior prototype validation.
The stability report landed in March. The client in Kuala Lumpur had committed to a retail launch in August — 22 weeks out. The mold design hadn’t started because the chocolate formulation was still being finalized. We had a conversation about lead time sequencing. It was not a comfortable conversation.
Here is what the 6–10 week standard timeline actually covers, broken into phases:
| Phase | Activity | Duration | Dependency |
|---|---|---|---|
| 1. Drawing & Spec Review | Review product dimensions, shrinkage data, machine interface spec. Produce 3D mold model. | 5–8 days | Requires cooled-product dimensions and formulation shrinkage rate before clock starts |
| 2. FEA Simulation (if required) | Thermal simulation of forming cycle, stress analysis on complex geometries. | 3–5 days | Required for domed truffles, multi-lobe shapes, relief surfaces |
| 3. Customer Drawing Approval | Client sign-off on 3D model and 2D dimensional drawing. | 3–10 days | Every revision round adds 5–8 days. Fastest when client provides detailed URS upfront. |
| 4. CNC Machining | Cavity machining, surface finishing to Ra spec, anodizing treatment. | 15–22 days | Aluminum machining faster than steel by 30–40% |
| 5. In-House Trial & CMM Check | Dimensional verification on all cavities (CMM). Trial forming run with film. Cavity release check. | 3–5 days | If CMM finds deviations, rework adds 5–7 days |
| 6. Delivery & FAT | Mold shipped to machine OEM or client facility. FAT with production chocolate batch. | 3–7 days (FAT) | FAT must use production-batch chocolate — not substitute. Formulation change after FAT requires re-validation. |
The Kuala Lumpur client made the August launch. Just. We compressed phase 3 by having them pre-approve dimensional tolerances in a kickoff meeting rather than a revision cycle. Phase 4 ran on a two-shift machining schedule. Total lead time: 8 weeks and 3 days. I won’t tell you that’s typical — it required specific capacity alignment on our end. Plan for 10–12 weeks if you want margin.
How Custom Mold Design Connects to Your Packaging Format and Total Line Cost
📌 Section Answer
Custom mold investment for a chocolate blister line typically ranges from $3,500 to $18,000 per mold set depending on cavity count, shape complexity, and material grade — and represents 8%–22% of total packaging line capital cost, making it the highest-leverage single design decision for long-term reject rate and SKU flexibility.
Mold cost is not an isolated line item. It determines your reject rate (and therefore your material waste per 1,000 units), your changeover time (and therefore your available production hours per shift), and your format flexibility (and therefore how many SKUs you can run without capital reinvestment). The decision to cut mold cost at the specification stage is recoverable — but only before tooling begins.
The relationship between mold design and packaging format choice is also consequential. If your product is moving from flow wrap to blister format — a transition I’ve seen many artisan and premium brands make for retail shelf differentiation — the mold design is where the format justification either holds or collapses. A blister format with a 6% reject rate and a 90-minute changeover does not deliver the presentation quality or the production economics that justified switching from flow wrap in the first place. For a detailed comparison of blister packaging against flow wrap across format, cost, and retail performance dimensions, see our analysis of chocolate blister packaging vs. flow wrap.
On the cost side: a custom mold set for a standard 6-cavity praline blister card in 6061-T6 aluminum runs approximately $4,500–$7,000. A complex 12-cavity truffle mold with FEA simulation and hard-anodized finish runs $9,000–$14,000. Multi-format sets (three molds sharing a common frame) run $12,000–$18,000. These numbers are real ranges from actual projects — not catalog estimates. For a fuller breakdown of how mold cost fits into total line investment, see our chocolate blister packing machine cost analysis, which covers mold amortization across production volume alongside machine, maintenance, and material costs.
🔴 Mold supplier cannot provide EU (EC) No 1935/2004 compliance documentation
What this means: The supplier either uses non-compliant base material, a non-food-safe coating, or has never been asked for it before — which tells you their typical customers are not in food packaging. Walk away, or require the documentation before deposit payment. A verbal “yes, it’s food safe” is not a compliance document. This matters at every food safety audit from BRCGS to SQF to EU market access review.
🔴 Mold supplier refuses to coordinate directly with your blister machine OEM on interface dimensions
What this means: You are about to become the technical translator between two suppliers who do not share accountability for the outcome. In my experience, 70% of FAT failures on chocolate blister lines with separate mold and machine suppliers trace back to interface mismatches that neither party caught because they never spoke directly. Require a joint technical review between mold supplier and machine OEM before drawing approval. If either party declines, that’s your answer about the working relationship you’re entering.
Frequently Asked Questions: Custom Mold Design for Chocolate Blister Packaging
❓ How long does custom mold design for a chocolate blister machine take?
Standard lead time is 6–10 weeks from approved drawing to FAT-ready mold delivery. Complex shapes requiring FEA thermal simulation add 3–5 days. Drawing revision cycles — caused most often by missing shrinkage data at the start — add 5–8 days per round. If your chocolate formulation is not finalized before mold design begins, budget 10–14 weeks and assume at least one revision cycle. The single most reliable way to compress lead time is to provide cooled-product dimensional data and formulation shrinkage rate in the first technical meeting, not after the drawing is issued.
❓ What material should a chocolate blister mold be made from?
Aluminum alloy 6061-T6 hard-anodized, or 7075-T6 for high-speed lines above 80 blisters per minute. Aluminum’s thermal conductivity (167–196 W/m·K) enables faster and more uniform forming temperature equalization than steel, which is critical for chocolate where the product load zone must stay below 35°C while the PVC film forms at 100°C–125°C. Aluminum also machines faster, reducing lead time by 30–40% versus steel. Require EU Regulation (EC) No 1935/2004 food contact compliance documentation regardless of material chosen.
❓ What is the typical reject rate for a correctly designed chocolate blister mold?
Under 3% at steady-state production speed, when mold geometry is validated against the specific chocolate formulation’s shrinkage rate and cavity dimensions are co-engineered with the blister machine OEM. Reject rates above 5% at steady state are almost always a mold geometry issue — specifically cavity undersizing (causing cracking) or draft angle insufficient for the shape (causing film grip and uneven wall thickness). Machine speed adjustment, film gauge change, and forming temperature tuning will not solve a geometry problem.
❓ Can the same mold be used on different blister machines?
Not without verification. Mold mounting interface — locating pin diameter, clamping bolt pattern, mold body height — varies between machine brands and sometimes between model years of the same brand. A mold built for one machine will not reliably fit another without dimensional confirmation. Before purchasing a second machine or a replacement mold, obtain the machine’s mold interface drawing and verify compatibility. This is a two-hour check that prevents a four-week delay.
❓ How much does a custom chocolate blister mold cost?
Real project ranges: standard 6-cavity praline mold in 6061-T6 aluminum, $4,500–$7,000. Complex 12-cavity truffle mold with FEA simulation and hard-anodized finish, $9,000–$14,000. Multi-format set (three molds, shared frame), $12,000–$18,000. These figures do not include machine purchase. For context on how mold cost fits into total line investment, the full chocolate blister packing machine cost breakdown covers mold amortization, material cost, and maintenance over a five-year production cycle.
❓ Does HIJ Machinery supply custom molds, or only machines?
HIJ supplies both, co-engineered as a single accountable package. Mold geometry, forming temperature profile, and sealing parameters are designed together — not independently. This eliminates the multi-vendor accountability gap where the machine supplier and mold shop each blame the other for reject rates. See the full chocolate blister packing machine specification for machine and tooling scope.
Get Your Custom Chocolate Blister Mold Specification Reviewed — Before Tooling Begins
HIJ Machinery co-engineers mold geometry, forming temperature, and sealing parameters as a single accountable package. Send us your chocolate dimensions and shape brief — we’ll return a mold specification review within 48 hours, at no cost.