
Case sealing troubleshooting guide
Start with the symptom, then separate the case, closure material, taping head and machine-transport variables. Observe one complete case safely, compare it with a known-good case, and change only one documented setting at a time.
This guide covers pressure-sensitive-tape case sealers in general. Use the exact machine and taping-head manuals for adjustments, parts and model-specific limits.
Start case sealer troubleshooting with a safe observation
Do not begin by turning several knobs. First record what the defect looks like, where it appears and whether it affects every case or only one material lot, size or fill condition. A repeatable observation is more useful than a guessed cause.

Case sealer problems: symptom-to-check table
The table is a triage tool, not a substitute for the equipment manual. A single symptom can have several causes, so confirm the evidence before changing a setting or replacing a part.
| Observed problem | Check first | Evidence to record | Stop and escalate when |
|---|---|---|---|
| Tape is off-center | Case entry angle, guide centering, flap alignment and tape tracking | Top view of the seam before and after the tape head | The case cannot travel square or guides/belts are damaged |
| Cut is ragged or a tail remains | Tape threading, contamination, tension and guarded cutter condition | Close-up of the tape end and the tape path | Cutter access, blade work or spring work is required |
| Tape lifts from the board | Board dust/coating, moisture, temperature, tape lot and wipe-down contact | Case lot, tape reference, conditions and time to failure | The approved material combination repeatedly fails |
| Case jams or stalls | Case dimensions, fill profile, squareness, guides, height and conveyor handoff | Video from safe viewpoints and the exact jam location | A person would need to enter a guarded or stored-energy area |
| Tape breaks during application | Damaged roll edges, threading path, roll rotation and excessive drag | Break location, tape-roll condition and lot | Roller, brake or taping-head repair is needed |
| Tape wrinkles or bubbles | Flap level, tape tracking, roller contact and case presentation | Wrinkle location and flap condition before sealing | The case or closure specification is inconsistent |
| Case is crushed or dented | Overfill/underfill, board strength, guide pressure, height and transfer impact | Filled weight, damage location and case dimensions | Product could be damaged or guarding/structure is involved |
| Case exits without tape | Tape supply, threading, leading tab and tape-head engagement | Alarm/state history and video of a complete cycle | The machine repeats an unsafe or unexplained motion |
1. Tape is crooked or off-center on the case seam
What the symptom suggestsThe case, seam or tape web may not be centered at the point of application.
What to inspectCase entry angle, side-guide symmetry, flap alignment, belt contact, tape-roll centering and the tape path.
Compare the seam position before the case reaches the taping head with the tape position after application. If the case enters at an angle, determine whether the problem begins upstream, at the conveyor transfer or at the guides. If the case is square but the tape tracks to one side, consult the taping-head manual for the model-specific web-alignment checks.
Do not copy a generic rail-clearance number from another machine. The correct guide condition depends on the case tolerance, board stiffness, filled weight, drive arrangement and OEM adjustment method. The goal is stable, square transport without damaging or dragging the case.
2. Tape does not cut cleanly or leaves a long tail
What the symptom suggestsThe tape may be threaded incorrectly, tension may be unsuitable, adhesive may be contaminating the cutting area, or a guarded cutter component may need service.
What to inspectThe exact tape path, end shape, tape tension behavior and whether the problem began after a roll or format change.
A jagged end is evidence, not permission to touch the blade. Stop and isolate the equipment before an authorized person inspects the guarded cutting system. Use the taping-head manual to identify the correct cleaning method, blade orientation, lubrication point, spring condition and replacement part. Solvents and lubricants also need to match the manufacturer’s instructions.
After any authorized work, restore guards, account for tools and test cases at a controlled rate. Record whether the cut is clean at both the leading and trailing tape legs; a problem at only one end can narrow the investigation.
3. Tape lifts, peels or has poor adhesion
Separate application from material compatibility. First ask whether the tape reached the intended position with continuous wipe-down contact. Then check the case surface, tape reference and environmental conditions. Dust, loose fibers, surface coatings, moisture, cold application conditions and variation in recycled corrugate can change both adhesion and how the board responds to pressure.
Case surface
Record board grade, recycled content if known, print or coating, dust, moisture, damage and the case lot.
Closure material
Record tape construction, width, lot, storage condition, roll damage and the supplier’s application range.
Application
Observe tape centering, flap contact, wipe-down path and whether lifting starts immediately or after handling.
Do not compensate for weak adhesion by applying unverified extra pressure. Excessive pressure can deform a weak, underfilled or overfilled case. If the approved case/tape combination remains unreliable, conduct a controlled material trial rather than repeatedly changing the machine.
If tape remains unsuitable after a controlled trial, compare the complete tape and hot-melt process boundaries. The choice should follow the board, seal requirement, environment, maintenance capability and acceptance test—not a generic preference.
4. Cases jam, stall or enter inconsistently
The jam location is the most useful clue. At the infeed, check pitch, orientation, guide entry and conveyor transfer. In the sealing zone, check the filled-case dimensions, flap condition, squareness and configured height/width. At discharge, check downstream blockage, speed matching and accumulation logic.
Irregular products can create a variable center of gravity or bulged case profile. Underfilled cases may lose stiffness; overfilled cases may resist flap closure. Run representative filled cases, not empty cartons, and compare the actual outside dimensions with the approved format range.
5. Tape breaks, snaps or will not remain ready
Inspect the consumable before the machine. Damaged roll edges, a telescoped roll, contamination or the wrong tape construction can create an intermittent break. If the material is sound, compare the installed tape path with the diagram on the specific taping head and observe whether the roll rotates smoothly without uncontrolled overrun.
Do not guess at brake, tension-roller or spring settings. Record the original condition and use the OEM procedure. If the leading tab retracts or will not stay in the application position, document when it happens—during threading, after a case, or during return of the applying mechanism.
6. Tape wrinkles, bubbles or bridges the seam
Check the case before blaming the tape head. Unequal flap height, flap memory, a wide gap, bulging contents or a bowed panel can prevent flat contact. Photograph the closed flaps immediately before sealing if the guarded line design permits a safe view.
If the flaps are acceptable, inspect tape tracking and application contact according to the manual. A wrinkle that always begins on the same side suggests a different cause from random bubbles across several case lots. Use that pattern to decide whether to investigate presentation, material or the application mechanism.
7. Cases are crushed, bulged or dented
Map the damage location. A mark at the guide entry suggests a presentation or width issue; top-panel compression suggests a height, fill or board-strength issue; an impact at discharge points to transfer or blockage. Note whether damage appears on an empty case, a representative filled case or only the heaviest format.
The machine, case and product load form one system. Do not accept a correction that improves transport but damages the board or product. If the required grip or compression is incompatible with the actual case, review the board, fill condition, drive architecture or format specification.
8. The machine runs but cases exit unsealed
Check whether closure material was available, correctly threaded and presented to the incoming case. Then check whether the taping head engaged the case and completed its return motion. Record the machine state, alarm history and the first failed cycle after a roll change, stop or restart.
A repeated unsealed case is not only a maintenance issue; it is also a detection and containment question. Define how the line identifies an empty/torn tape condition, what the operator does with suspect cases, and how unsealed output is prevented from mixing with accepted product.
Is the same fault returning after every adjustment?
Send the filled-case dimensions and weight, board and tape references, safe-view video, machine/taping-head model, fault history and current settings. HIJ can review whether the issue points to setup, materials, a worn component or a specification mismatch.
Use condition-based maintenance plus the OEM schedule
There is no reliable universal replacement interval for blades, rollers, belts or springs. Duty cycle, tape, dust, board fibers, environment and the component design all matter. Build the site schedule from the manufacturer’s manual, then refine it with inspection records and failure history.
| Review point | What to record | Why it helps |
|---|---|---|
| Start of planned run | Correct case/tape, guards, tape path, settings and first accepted sample | Separates setup error from deterioration during the run |
| Routine inspection | Residue, wear, loose/damaged parts, roller rotation, belt condition and abnormal sound | Finds visible change before it becomes a recurring fault |
| After maintenance | Parts used, settings changed, guard restoration and verification sample | Creates a traceable baseline for the next diagnosis |
| After material change | Case and tape references, environment and seal-quality result | Shows whether performance changed with the consumables |
| Recurring defect review | Frequency, format, lot, location, downtime and corrective action | Distinguishes a chronic design/specification issue from one failure |
What to send a technician or equipment supplier
A precise support package reduces back-and-forth and discourages unsafe guesswork. Do not film from inside a guarded area or defeat an interlock to obtain a better view.
- Machine and taping-head manufacturer, model and serial information
- Case drawing, actual outside dimensions, board specification and filled weight
- Tape manufacturer, reference, width, lot and storage/application conditions
- Clear photographs of an accepted seal and the defect
- A short video from permitted safe viewpoints showing infeed, application and discharge
- The exact format/settings used, original values and any authorized change
- When the fault began and whether it follows a product, case lot, tape lot or shift
- Alarm history, stop frequency, reject/rework quantity and any damaged components
When troubleshooting reveals a specification mismatch
If the same defect returns across correctly maintained components and approved settings, the underlying issue may be the project boundary. Examples include case variation outside the tested range, unsuitable closure material, insufficient control of upstream presentation, an incompatible drive method, or no defined response to downstream blockage.
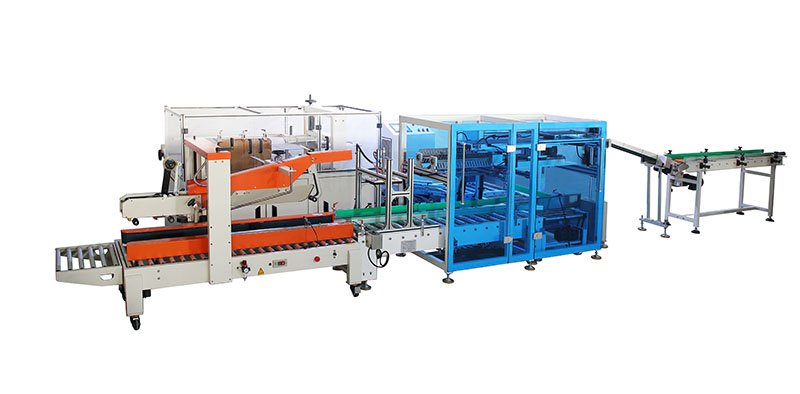
For a replacement or new project, define the filled case, closure material, accepted sealed-case output and interface behavior before comparing machines. Review the automatic case sealing machine page for a project-specific closure scope, or compare the wider case packing machine range when forming, loading and sealing may need one integrated boundary.
Official safety and troubleshooting references
Use the manual for the exact equipment in service. The links below support the general safety and diagnostic boundaries in this guide; they do not authorize work on a different model.
- OSHA 29 CFR 1910.147: Control of hazardous energy — requirements for controlling unexpected energization and stored energy during servicing and maintenance.
- 3M-Matic AccuGlide V HSP equipment manual — model-specific safety, tape-path and troubleshooting examples for a taping head.
References checked on 15 September 2026. Employers and equipment owners must determine the procedures and requirements that apply at their site.
Case sealer troubleshooting FAQ
Why is my case sealer applying tape crooked?
Check whether the case enters square, the guides are centered, the flaps meet correctly and the tape web tracks through the taping head. Do not apply a universal rail-clearance value; use the case tolerance and the adjustment procedure for the specific machine.
Why does the case sealer leave a ragged cut or long tape tail?
Possible causes include incorrect threading or tension, adhesive contamination and a guarded cutter component that needs service. Stop and isolate the machine before an authorized person inspects the cutting system, then follow the taping-head manual.
Why does sealing tape lift from a corrugated case?
Check board dust, fibers, coatings, moisture and temperature as well as the tape reference, lot, storage and wipe-down contact. If the approved combination still fails, run a controlled material trial instead of increasing pressure without evidence.
What causes cases to jam in an automatic case sealer?
Common boundaries include skewed infeed, dimensional variation, underfilled or overfilled cases, incorrect guide or height setup, unstable conveyor handoff and downstream blockage. Record the exact jam location and never reach into the guarded machine to clear it.
Why does the tape break during application?
Inspect damaged roll edges, tape condition, the model-specific threading path, roll rotation and excessive drag. Record where the tape breaks and whether it began after a roll change before making one authorized adjustment at a time.
How often should a case sealer blade be replaced?
Use the equipment manufacturer’s inspection and replacement criteria. There is no universal interval because tape, duty cycle, contamination and cutter design vary. Blade inspection or replacement requires the machine-specific energy-control and guarding procedure.
Can an operator repair a case sealer?
Operators may perform only the tasks allowed by their training, site procedure and OEM instructions. Work involving guards, blades, stored energy, electrical or pneumatic systems, or internal mechanisms should be performed by authorized personnel after proper isolation.
What information should I send for case sealer support?
Send the machine and taping-head identification, filled-case dimensions and weight, board and tape references, accepted and failed samples, safe-view photos or video, settings, alarm history and a clear description of when the fault started.
Turn a recurring fault into a testable case-sealing requirement
Send representative filled cases, board and tape references, required accepted output, line layout, fault evidence and the current equipment boundary. HIJ can review the application questions that should be resolved before a retrofit or new case sealer quotation.
Review My Case-Sealing Application